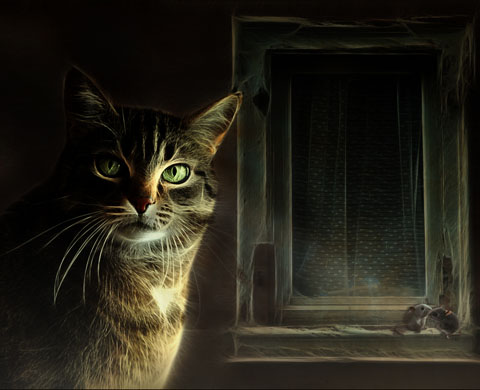
Cute Cat & Woman Movie
(2013년 7월 10일 교육자료)
1.properties→ Movie properties 클릭
width : 700 height : 550
Frame Rate : 25 Background color →검은색
stop playing at end of movie 체크
Export Settings For Movie →version : swf9
image quality : 60
2. Content→Import to Library image→
a1.jpg~a7.jpg 인물1.png~인물7.png
3. Insert-Import Image→main.jpg 입력
Reshape O=X체크 Center-X : 350 Y : 275 W : 700 H : 550
4. Scene-1클릭 툴바 T클릭-오른쪽 패널 Text Tool
글꼴 : Derniere, 32p, #CCCCCC 진하게, Amount of kerning : 15
㉠ 바탕 클릭→Edit클릭-Enter Text창에- “Cute Cat & Woman Movie”입력
㉡ Transform-Center X : 360 Y : 28
㉢ Timeline1→Core Effects→ Transform Duration:120
Effect창 열고 Filter→ Drop Shadow→Default
㉣ Grouping→ Group as Movie clip→이름 : 제목
stop playing at end체크
㉤ Timeline 20 프레임→place
5. Scene-1클릭 툴바 T클릭
우측 패널 Text Tool
글꼴 : Derniere, 32p, #990000 진하게
㉠ 바탕 찍고 Edit클릭-Enter Text창에-“Enter” 입력
㉡ Transform-Center X : 460 Y : 385
㉢ Timeline 1 프레임-Looping continuously–Wild-Flimmer Duration:20
Effect창 열고 Filter→ Drop Shadow→Default
㉣ Grouping→ Group as Movie clip→enter
㉤ Timeline 150 프레임→Fade-Fade in Duration:20
㉥ Insert-Import Animation→별무리.swf
㉦ Transform O=X체크 Center X : 280 Y : 160
㉧ main.jpg+제목+Enter+별무리=Grouping→ Group as Movie clip→main
stop playing at end체크
㉨ Timeline 1 프레임→place
6. Insert-Import image→바탕.jpg
㉠ Reshape O=X체크 Center X : 350 Y : 275 W : 700 H : 550
㉡ Timeline 3 프레임→Fade-Fade in Duration:20
7. Insert-Import Image→heart.gif
㉠ Transform-Center O=X체크 Center X : 93 Y : 70 Lock체크 70%
㉡ Timeline 25 프레임-Fade-Fade in Duration:20
8. Scene-1클릭 툴바 T클릭-오른쪽 패널 Text Tool
글꼴 : Charterwell, 28p #CCCCCC 진하게
㉠ 바탕 하트 클릭 →Edit클릭-Enter Text창에- “Cute Cat”입력
㉡ Transform-Center X : 115 Y : 65
㉢ Timeline 50 프레임→Slide-In from Top→ Duration:20
Effect창 열고 Filter→ Drop Shadow-Default
9. Scene-1클릭 툴바 T클릭-오른쪽 패널 Text Tool
글꼴 : Derniere, 30p, #CCCCCC 진하게 자간 -10
㉠ 바탕 클릭 →Edit클릭-Enter Text창에- “Cute Cat & Woman Movie” 입력
㉡ Transform-Center X : 400 Y : 35
㉢ Timeline1 프레임→Core Effects-Transform Duration:50
Effect창 열고 Filter→ Drop Shadow→Default
㉣ Timeline 51 프레임→Move Duration:50
㉤ Grouping→ Group as Movie clip→제목1
㉥ Timeline 110 프레임→Fade-Fade in Duration:20
10. Insert-Import Image→top.jpg
㉠ Reshape O=X체크 Center X : 440 Y : 280 W : 480 H : 380
㉡ copy object→paste in place
㉢ 복사본(위)을 Break→ Break into pieces
Break : Regular Grid Columns : 1 Rows : 10
Allow non-briangular pieces체크
Inflate all pieces by:0.3
Cascade Order 첫 번째 ok→ top.jpg(조각10)생성
㉣ Timeline1 프레임→Core Effects-3D Spin Duration:60
※위는 조각10개가 물결처럼 내려오고 아래는 원이미지의 역할을 하여 통상 물결 효과의 배경과 같음
㉥ Insert-Import Animation→나비나라.swf
㉮Transform-O=X체크-Center X : 440 Y : 275
㉦ Insert-Import image→액자.png
㉮ Reshape-O=X체크-Center X : 440 Y : 280 W : 500 H : 400
㉧ 액자+나비+top.jpg(물결효과)+top.jpg(원이미지)=
Grouping→ Group as Movie clip→top
㉨ copy object→paste in place→Effect(잠시 아래에 내려놓음)
㉩ top 효과 복사하지 않은 상태(원본 즉 2항 다음 작업임)
Timeline 70→Core Effects →Transform Duration:30
Effect창 열고 Scale:105
㉪ top 효과 Timeline 221 프레임→Remove
11. Insert-Import image→인물top.png
㉠ Reshape O=X체크 Center X : 105 Y : 310 W : 246 H : 387
㉡ Timeline 100 프레임→Fade-Fade in Duration:20
㉢ Timeline 221 프레임→Remove
12. 아래에 내려놓았던 effect를 제일 위로 올리고
㉠ effect열고 제일 아래 top.jpg를 선택하고
Properties-Fill color-Image, Library Content에서 a1.jpg로 교체
㉮ effect열고 Goup top.jpg를 열고(+를 –로) 아래 top.jpg 10개를 모두선택
Properties-Fill color-Image, Library Content에서 a1.jpg로 교체
㉯ Effect를 닫고 Timeline 1 프레임→Core Effects-Transform Duration : 30 Effect창 열고 Scale:105
㉡ Insert-Import image→인물1.png
㉮ Transform O=X체크 Center X : 220 Y : 290 Lock체크 80%
㉯ Timeline 30 프레임→Fade-Fade in Duration:20
13. Scene-1클릭 툴바 T클릭-오른쪽 패널 Text Tool
글꼴 : 윤고딕120, 14p, #CCCCCC 진하게 Amount of leading : -5
㉠ 오늘 자료에서 시모음.txt열고
첫 번째 시 “소중한 것들” 모두복사
왼쪽 클릭 →Edit클릭-Enter Text창에 붙여넣기
㉡ Transform-Center X : 90 Y : 310
14. Scene-1클릭-Tools-Rectangle Tool클릭
㉠ properties→ open image(주황색버튼)→pa-1.jpg
왼쪽 poem위에 대강 드래그
㉡ Reshape Center X : 220 Y : 310 W : 430 H : 340
㉢ Timeline1 프레임→Move Duration : 80 빨갛게 활성화
※실지는 Timeline80에서 Double Click
㉣ Transform Center X : 0 Y : 310 W : 430 H : 340
이동툴 누름
※결과: shape가 왼쪽으로 이동 한다
㉤ Timeline 81프레임→Move Duration : 80 빨갛게 활성화
※실지는 Timeline160에서 Double Click
㉥ Transform Center X : 220 Y : 310 W : 430 H : 340
이동툴 누름
※결과: shape가 원위치로 이동 한다
㉦ pa-1.jpg(shape)+Text(시)=Grouping→ Group as Movie clip→poem
Use Bottom object as mask체크
㉮ Window→Filter→ Drop shadow→Default
㉯ Timeline 50 프레임→Fade-Fade in Duration:20
㉧ poem+인물1.png+effect=Grouping→ Group as Movie clip→a1
stop playing at end체크
㉮ a1을 copy object →paste in place 6개→이름 : a2~a7
ⓐ a2열고 Effect열고(+를 –로) 아래 top.jpg클릭
Properties-Fill color-Image, Library Content에서 a2.jpg로 수정
① a2열고 Effect열고(+를 –로) 위 Group top.jpg을 열고(+를 –로) a1.jpg 10개를 모두선택
Properties-Fill color-Image, Library Content에서 a2.jpg로 수정
② a2열고(+를 –로) 인물1.png클릭
Properties-Fill color-Image, Library Content에서 인물2.png로 수정
Transform-Flip Horizontal(방향전환)
| 인물1 | 인물2 | 인물3 | 인물4 | 인물5 | 인물6 | 인물7 |
방향 |
| hori | hori |
| hori |
| hori |
크기 | 78% | 78% | 77% | 78% | 76% | 76% | 78% |
※ 방향은 Transform-Flip Horizotal(좌, 우 방향전환)를 말함.
※ 크기는 Transform-Lock체크 80%한 것을 다시 Transform Lock 체크 조정한 크기임.
※위와 같이 추가 조정하고도 각 인물의 구두가 파묻힌 것은 개별 적으로 인물을 위로 적당히 드래그해서 구두가 위로 올라오도록 조정할 것
③ poem의 수정
❶ 자료에서 시모음.txt열고 2번째 시“은행잎”을 모두 선택 복사하여
❷ a2열고(+를 –로) poem열고(+를 –로) “T 소중한 것들” 선택
❸ Properties-Edit클릭-Enter Text창에 “T 소중한 것들”모두선택 “은 행잎”을 붙여넣기, Amount of leading : -10
※줄간격 조정요
| 제 목 | Amount of leading |
| 제 목 | Amount of leading |
a1-porm | 소중한 것 들 |
| a5-porm | 물망초 |
|
a2-porm | 은 행 잎 | -10 | a6-porm | 종이학 | 10 |
a3-porm | 추억이란 | -20 | a7-porm | 장미뒷모습 | -20 |
a4-porm | 창가에서 | 10 |
|
|
|
㉯ a3 ~ a7 도 위 와 같은 방법으로 수정
15. Scene-1클릭 툴바 Autoshape Tool(별)클릭→2D→Rectangle_rounded를 Move창에 드래그
㉠ properties→Stroke Style : none
Fill color→solid선택-#9966ff
㉡ Reshape Center X : 300 Y : 485 W : 30 H : 30
㉢ Grouping→ Group as Button→but1
㉣ Properties-Has separate over state 체크
㉤ but1을 열고-Over State열고 Rectangle_Rounded클릭
㉦ Transform Bottom Center H : 40
㉧ but1을 닫고 Copy object→ Paste in place 6개 이름 : but2~but7
㉨ button의 색상수정
㉮ but2열고(+를 –로) Up/Down/Hit state의 Rectangle_Rounded클릭
Properties-Fill color→ solid 색상:3366ff
㉯ but2열고 over state의 Rectangle_Rounded클릭
Properties-Fill color→ solid 색상:3366ff
㉰ a3~a7의 버튼 색상도 아래 표에 의해서 수정 한다.
a1 | 9966ff | a4 | 669900 | a7 | 990000 |
a2 | 3366ff | a5 | ffff00 |
|
|
a3 | 00ffff | a6 | ff9900 |
|
|
㉩ button의 가로정렬
but7→Transform X : 510 Y : 485
(실패경험)먼저 but7을 위와 같이 이동한 다음, but6을 but7의 왼쪽에 적당히 갖다 놓고, 그 다음 but5를 but6의 왼쪽에 갖다 놓는다. 이와 같이 but2까지 적당히 순서대로 우측에 이동한 다음
but1→Transform X : 300 Y : 485 하고
아래와 같은 작업을 한다
아웃라인에서 but1~but7 모두선택 하고
Window→Align→Align to : All Selected
Space evenly→ Space Horizontally 클릭
㉪ but1~but7 을 모두 선택하고 Timeline 140→
Appear into position→Flatten-Flat in Duration:20
㉫ 효과를 10씩 물림
16. Insert-Import image→바1.png
㉠ Reshape O=X체크 Center X : 350 Y : 275 W : 700 H : 550
㉡ Outline의 바1.png를 but1 아래로 내려놓는다.
17. 효과 Scene-1줄 Timeline 2.220.222.224.226.228.230.232.234 →
Movie control→stop
| place | Remove |
a1 | Timeline 221 | Timeline 223 |
a2 | Timeline 223 | Timeline 225 |
a3 | Timeline 225 | Timeline 227 |
a4 | Timeline 227 | Timeline 229 |
a5 | Timeline 229 | Timeline 231 |
a6 | Timeline 231 | Timeline 233 |
a7 | Timeline 233 |
|
18. Scene-1줄 Timeline 3→Frame SetLabel(....)
Label: n1을 입력
㉠ Scene-1줄 Timeline221.223.225.227.229.231.233→Frame SetLabel(....)
Label:b1~b7을 입력
19. main열고 enter클릭→script창 열고
Add Script→ Events→ Button→ on(release)
Add Script→ Movie control→Goto and play→gotoAndplay(LABEL)
Target : _root Gotolabel : n1
20. but1 클릭→Script창 열고
Add Script→ Events→ Button→ on(release)
Add Script→ Movie control→Goto and play→gotoAndplay(LABEL)
Target : _root Goto label : b1
Add Script→sound→play Sound(...)
import→고양이야옹.wav
위 소스를 복사하여 but2 클릭
Scirpt창 열고 붙여넣기 한 다음 Goto label수치를 아래 표에 의하여 수정
but | but1 | but2 | but3 | but4 | but5 | but6 | but7 |
Goto label | b1 | b2 | b3 | b4 | b5 | b6 | b7 |
21. Scene-1클릭 툴바T클릭
Text Tool 글꼴 : Derniere 26, 연회색
㉠ 좌 하단 바 찍고 Edit클릭-Enter Text창에-“Replay" 입력
㉡ Transform-Center X : 50 Y : 525
㉢ Timeline 1→Looping Continuously →Wild-Flimmer Duration:20
Effect창 열고 Filter→ Drop shadow→Default
㉣ Grouping→ Group→ as Movie clip→replay
㉤ Timeline 205→Fade-Fade in Duration:15
22. replay 클릭→Script창 열고
Add Script→ Events→ Button→ on(release)
Add Script→ Movie control→Goto and play→gotoAndplay(FRAME)
Target : _root Goto frame : 1
23. Insert-Import Animation-full_0710.swi
㉠ Transform O=X체크 Center X : 675 Y : 35
㉡ Timeline1→place
㉢ Insert-Import Animation-music_0710.swi(싸인을 본인 것으로 교체)
㉮ Transform O=X체크 Center X : 535 Y : 515
㉯ Timeline1→place
24. Outline의 아래 “제목+T Cute cat+heart_gif”를 맨 위로 올린다.

'Swish Max 4 > shish 공부' 카테고리의 다른 글
| 바다의 시 셋 (0) | 2013.08.13 |
|---|---|
| 내 마음의 등대 / 우기수 (0) | 2013.07.29 |
| 黃眞伊의 詩와 사랑 (0) | 2013.07.03 |
| 바다를 찾던 날에/윤정강외 넷 (0) | 2013.06.26 |
| Duplicate Movie 영상 (0) | 2013.06.21 |